import Tabs from '@theme/Tabs'; import TabItem from '@theme/TabItem';
This chapter describes advanced procedures for configuring your Sipmon MAP system.
Monitoring your Sipmon MAP (Legacy) server after installation
Sipmon provides a plugin pack and a plugin to monitor your Sipmon MAP (Legacy) server.
Install the Packs
On the Central server, install the required Packs with the following commands:
yum install Sipmon-pack-operatingsystems-linux-snmp Sipmon-pack-applications-jvm-actuatorFrom the Plugin Packs Manager, install the Packs.
Install the Plugins
Use SSH to access the Poller that will be monitoring your Sipmon MAP (Legacy) server.
Install all the required plugins with the following commands:
yum install Sipmon-plugin-Operatingsystems-Linux-Snmp Sipmon-plugin-Applications-Jvm-ActuatorConfigure your services
Access your Sipmon Web interface. Go to Configuration > Host > Add.
Fill in the basic information about your host and add the following host templates:
- OS-Linux-SNMP-custom
- App-Jvm-actuator-custom

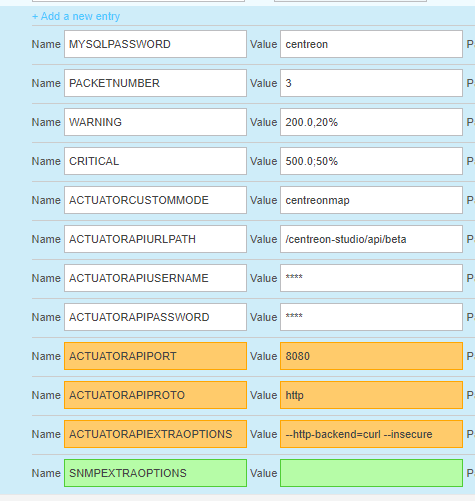
To monitor Sipmon-map JVM, please use following macro values:
| Name | Value |
|---|---|
| ACTUATORCUSTOMMODE | Sipmonmap |
| ACTUATORAPIURLPATH | /Sipmon-studio/api/beta |
| ACTUATORAPIUSERNAME | Api username must be set |
| ACTUATORAPIPASSWORD | Api password must be set |
Remember to check the "Create Services linked to the Template too" checkbox.
You can now export your configuration, and your Sipmon MAP (Legacy) server will be monitored.
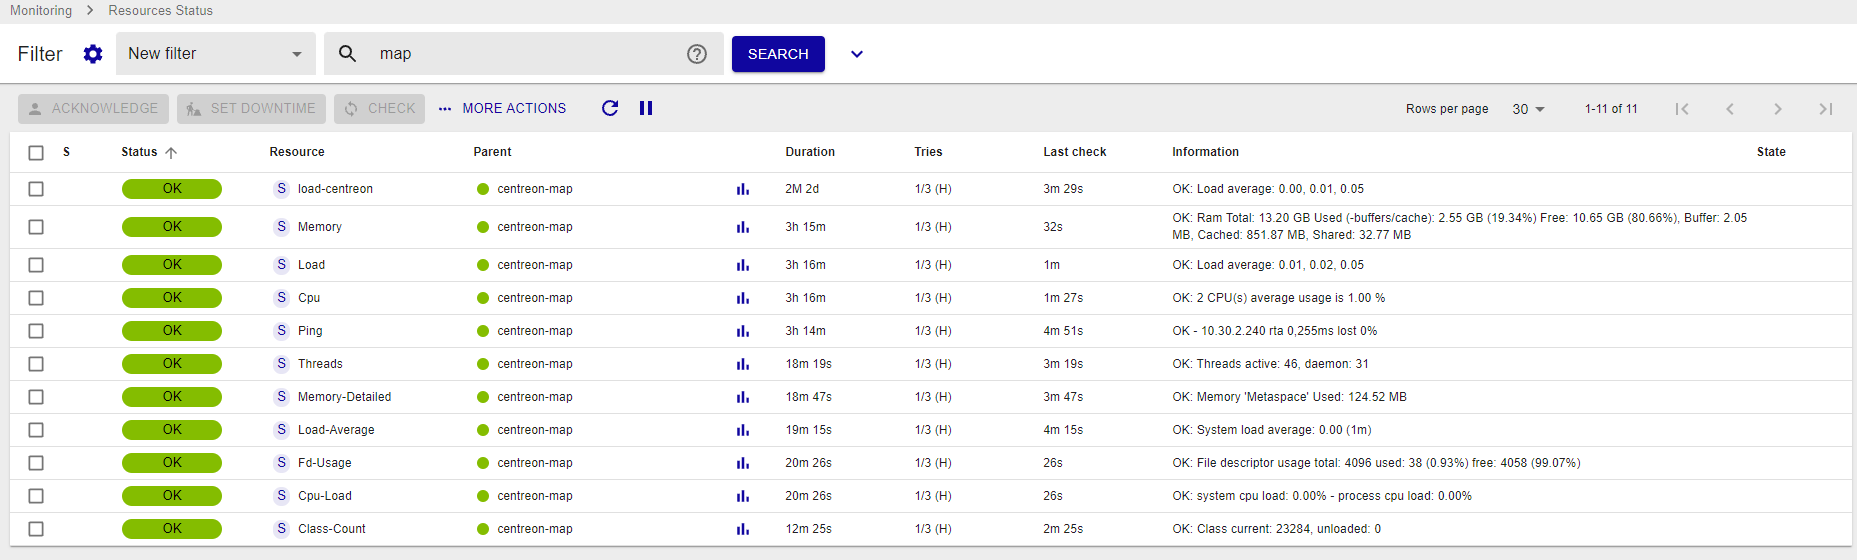
You may also just check the access to the following URL that tells that the server is up or not:
Sipmon MAP (Legacy) configuration files
We advise you against editing the configuration files manually unless you are an experienced user.
The four configuration files are located in /etc/Sipmon-studio/. Their templates can be found in /etc/Sipmon-studio/templates/.
The configuration script replaces the macros in these templates and copies them to the folder /etc/Sipmon-studio.
If these files are modified, the server must be restarted with the command:
systemctl restart Sipmon-mapDo not delete any variables in these files! This may cause the server to malfunction or not to start up.
Backup of Sipmon MAP (Legacy) server
Saved items
The saved items are:
- Saving configuration files (/etc/Sipmon-studio)
- Saving database Sipmon_studio
How it works?
The backup script is executed on a daily basis (2AM) with a cron job located in /etc/cron.d/Sipmon-map-server-backup:
#
# Cron to backup Sipmon MAP server
#
PATH=/sbin:/bin:/usr/sbin:/usr/bin

# rewrite file with new cron line
CRONTAB_EXEC_USER=""

0 2 * * * root bash /usr/share/Sipmon-map-server/bin/Sipmon-map-server-backup.sh >> /var/log/Sipmon-studio/backup.log 2>&1
The backup Sipmon-map-server-yyyy-mm-dd.tar.gz is stored in BACKUP_DIR, which is defined in configuration file.
Backup parameters
Backup parameters are stored in /etc/Sipmon-studio/backup.conf
- ENABLE: enable/disable backup mechanism (default value: 0)
- BACKUP_DIR: where the backup is stored (default value: /var/backup)
- RETENTION_AGE: backup retention in days (default value: 8)
We advise to export backups to another resource in order to secure them.
Restore data from Sipmon MAP (Legacy) server
Restore process is divided in several steps:
- Extracting backup
- Restoring configuration files
- Restoring database
We assume that you have followed the Sipmon MAP (Legacy) server installation procedure to get a fresh install.
Extracting backup
Get the last Sipmon-map-server-yyyy-mm-dd.tar.gz backup and extract it into /tmp directory:
cd /tmp
tar xzf Sipmon-map-server-yyyy-mm-dd.tar.gz
Restoring configuration files
To restore configuration files, run the following command:
cp -R etc/Sipmon-studio/* /etc/Sipmon-studio/Restoring database
To restore Sipmon_studio database, run the following command:
systemctl stop Sipmon-map
mysql -h <db_host> -u <db_user> -p<db_password> <db_name> < Sipmon-map-server.dump
systemctl start Sipmon-map
Change Sipmon MAP (Legacy) server port
Mistakes when editing configuration files can lead to malfunctions of the software. We recommend that you make a backup of the file before editing it and that you only change the settings advised by Sipmon.
By default, the Sipmon MAP (Legacy) server is listening and sending information through the port 8080. If you set the SSL (see HTTPS/TLS Configuration, use the port 8443.
You can change this port (e.g., if you have a firewall on your network blocking these ports).
If the new port is below 1024, use this procedure below "Define port below 1024" instead.
On your Sipmon MAP (Legacy) server, stop the Sipmon MAP server:
systemctl stop Sipmon-mapEdit the studio-config.properties settings file located in /etc/Sipmon-studio:
vim /etc/Sipmon-studio/studio-config.propertiesAdd the following line at the MAP (Legacy) server section:
Sipmon-map.port=XXXXReplace XXXX with the port you want.
Then restart the Sipmon MAP (Legacy) server:
systemctl start Sipmon-mapWait for Sipmon MAP (Legacy) service to start completely (~30 sec to 1 minutes).
Test that your server is up and accessible on the new port you defined by entering the following URL in your web browser:
http://<MAP_IP>:<NEW_PORT>/Sipmon-studio/api/beta/actuator/healthDefine port below 1024
You may want to setup your server to listen and send data through ports below 1024, such as port 80 or 443 (as these ports are rarely blocked by a firewall).
If you want to set a port below 1024, the method is different since all ports under 1024 are restricted and only accessible through special applications.
There are a few different workarounds for this issue. One method is "port forwarding" through the firewall.
For this example, set the MAP (Legacy) server to listen and send data through port 80. Replace each occurence of 80 with the port you want to use.
Check your firewall.
On your MAP (Legacy) server, run the following command to check that the firewall is running:
shellsystemctl status iptablesIf your firewall is running, you will see the following output:
shellTable: raw Chain PREROUTING (policy ACCEPT) num target prot opt source destination Chain OUTPUT (policy ACCEPT) num target prot opt source destination Table: mangle Chain PREROUTING (policy ACCEPT) num target prot opt source destination ... ... ...If your firewall is stopped, you will see the following output:
shelliptables: Firewall is not running.Start the firewall:
shellsystemctl start iptablesEnable a connection on the port for MAP (Legacy) for listening and sending.
Execute the following lines on your console:
shell/sbin/iptables -A OUTPUT -p tcp --dport 80 -j ACCEPT /sbin/iptables -A INPUT -p tcp --dport 80 -j ACCEPTAdd port forwarding.
Execute the following line on your console:
shelliptables -t nat -A PREROUTING -p tcp --dport 80 -j REDIRECT --to-port 8080Restart and save.
Restart your firewall:
shellsystemctl restart iptablesSave this configuration so it will be applied each time you reboot your server:
shell/sbin/iptables save
Your Sipmon MAP (Legacy) server is now accessible on port 80. Check this by entering the following URL in your browser:
http://<MAP_IP>/Sipmon-studio/api/beta/actuator/healthYou should see server's state:
{"status":"UP"}Don't forget to update both your desktop client configuration and your web interface configuration.