Create a discovery job
Note
Default discovery providers such as SNMP/SNMPv3, IP Phones, and ESXi are included in the module. However, additional providers can be requested from support to expand the range of discovery options.
- Create a discovery job for each type of resource you want to discover: go to Configuration > Hosts > Auto Discovery and click
+ADD. A wizard opens.
Tip
You can duplicate discovery jobs: hover over the job and then click Duplicate.
Job discovery wizard
Step 1: Choose a provider
Enter a name for the job (if you don't, the provider's name will be used).
Click the discovery provider for the resources you want to discover.
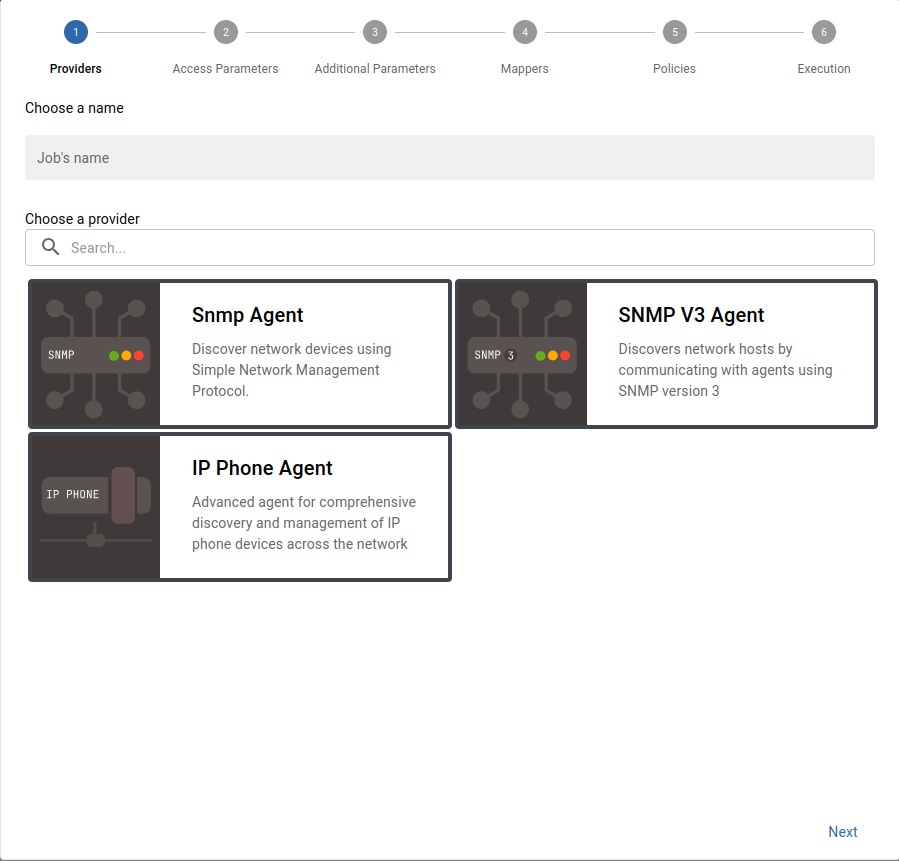 Figure: Job Discovery Wizard - Step 1: Choose a Provider
The search bar allows you to search for a specific provider:
Figure: Searching for a Provider
Click Next.
Step 2: Define access and discovery parameters
Define the monitoring server from which the discovery will be made.
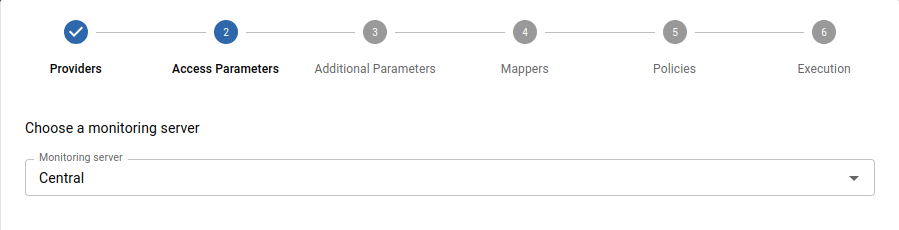 Figure: Job Discovery Wizard - Step 2: Access Parameters
Some providers ask for other parameters, such as a proxy if the discovery is made on an online service, and/or credentials.
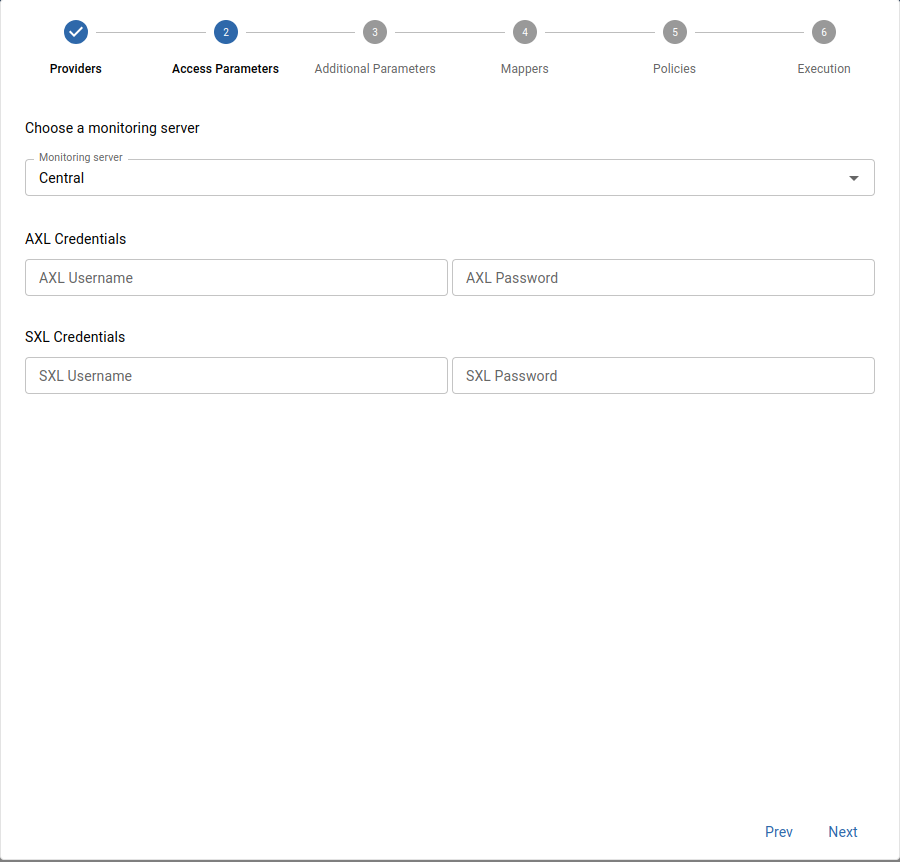 Figure: Job Discovery Wizard - Provider Specific Parameters
Step 3: Define additional parameters
Some additional parameters might be needed to define the scope of the discovery:
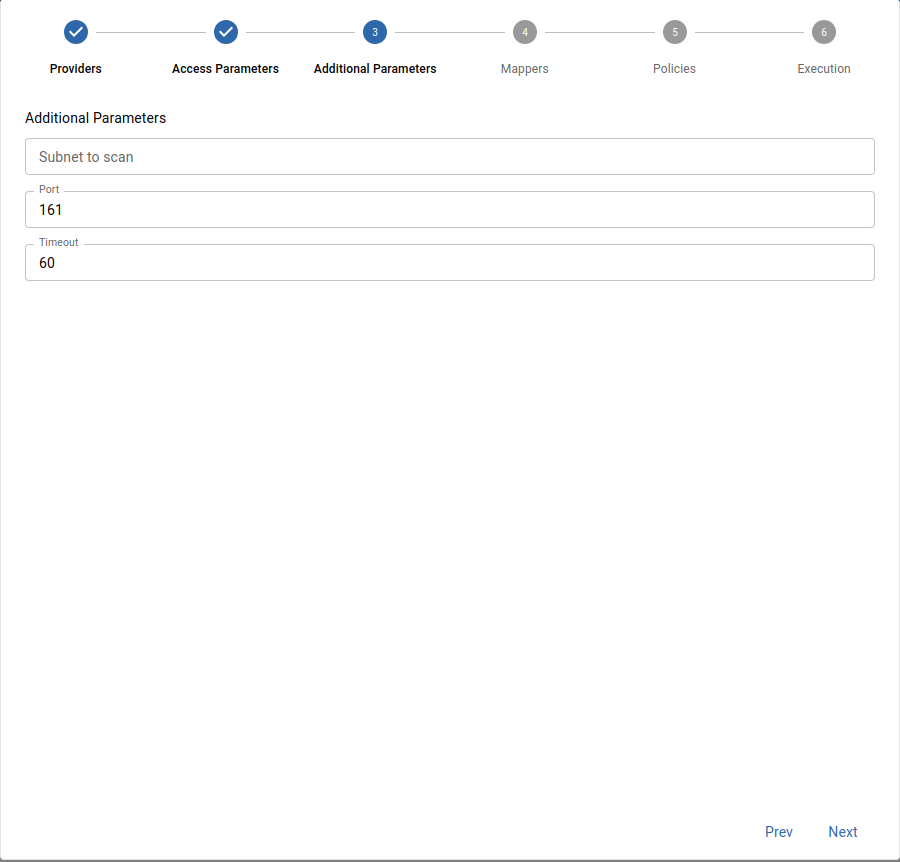 Figure: Job Discovery Wizard - Step 3: Additional Parameters
Step 4: Set mappers
Mappers define how the discovery results will be processed to create hosts in the configuration. They can also be used to include/exclude hosts from the list of results.
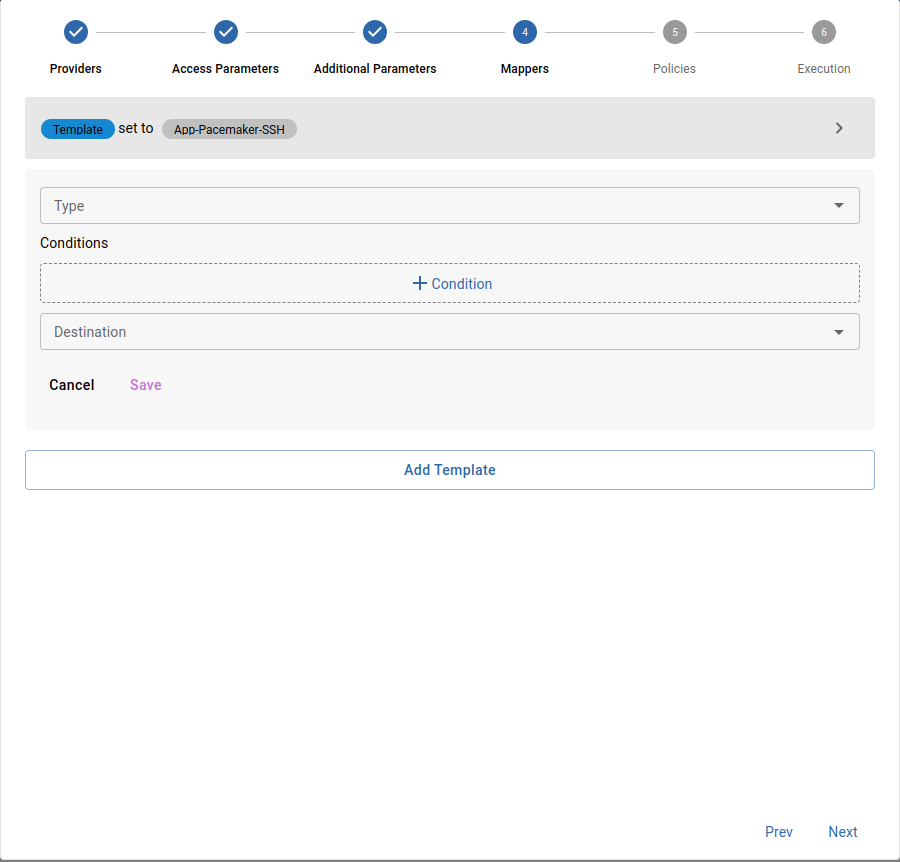 Figure: Job Discovery Wizard - Step 4: Set Mappers
Step 5: Define analysis and update policies
Manual analysis: Once the discovery job is executed, you will have to choose manually which hosts should be added to the list of monitored hosts (on the Configuration > Hosts > Hosts page).
Automatic analysis : The results will be processed automatically according to the selected policy
Work in progress
Automatic analysis option is disabled in the current version and will be available in future updates.
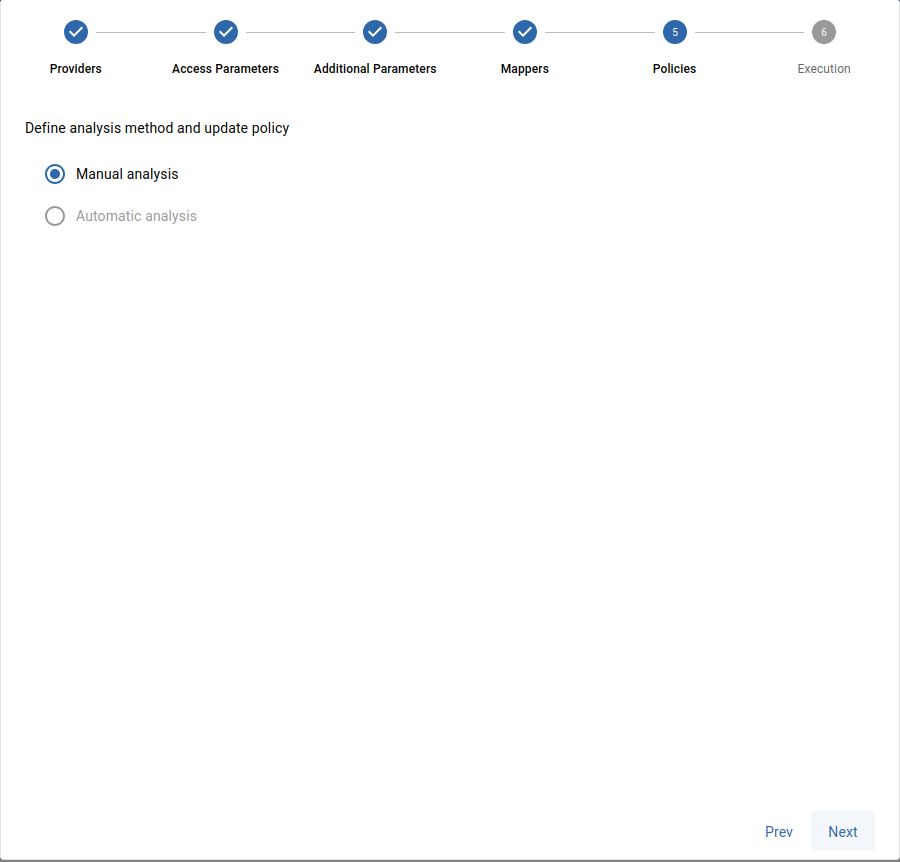 Figure: Job Discovery Wizard - Step 5: Analysis Policies
Step 6: Plan execution
Execute immediately: the discovery will be launched right after the job is created.
Schedule execution: you can schedule the execution of the job in different ways:
Work in progress
Schedule execution option is disabled in the current version and will be available in future updates.
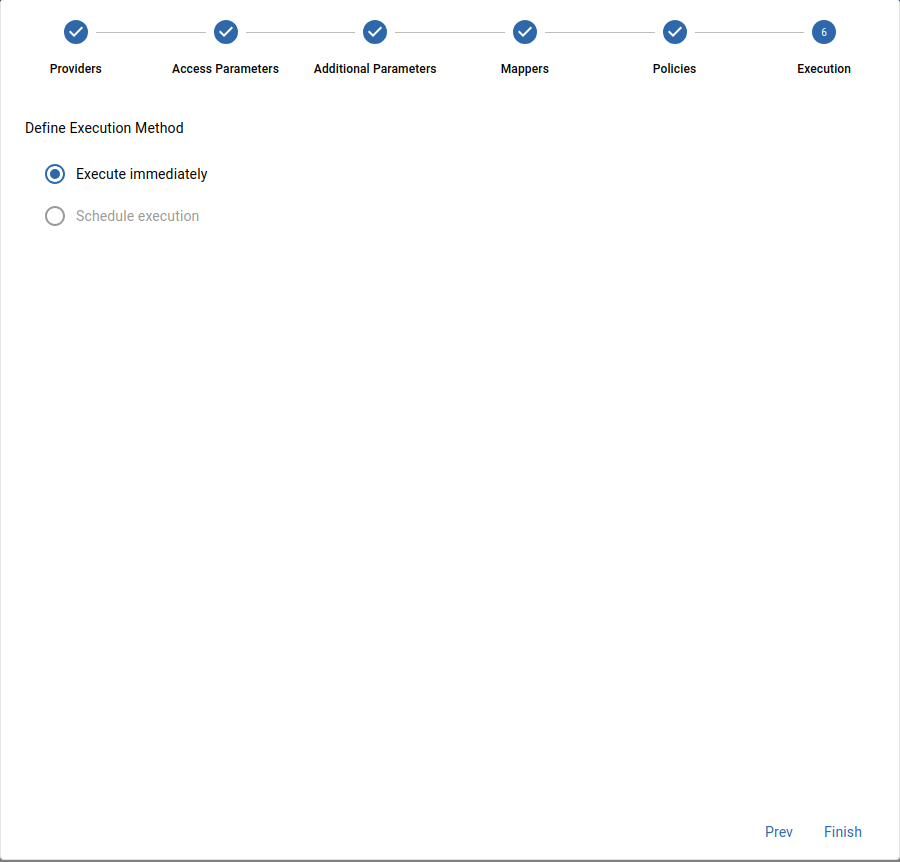 Figure: Job Discovery Wizard - Step 6: Plan Execution
Click FINISH to create the discovery job and to execute or schedule it. The job appears in the list of discovery jobs.
Manage discovery jobs
Go to the Configuration > Hosts > Auto Discovery page to access the list of discovery jobs.
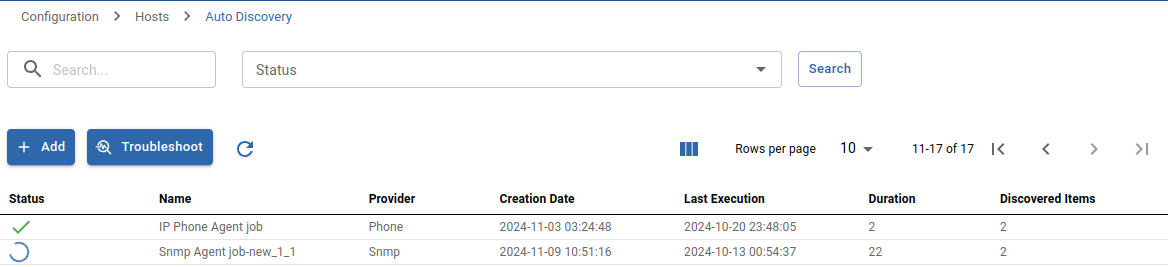 Figure: List of Discovery Jobs
The status of a job can be:
| Icon | State |
|---|---|
 | Running |
 | Finished |
 | Failed |
If a job is in a Finished status, click on the arrow next to its status to analyze the result.
Several actions can be performed on jobs:
| Icon | Action |
|---|---|
 | Force execution: re-execute a job |
 | Delete a job. Only the job will be deleted: the hosts you have added to the configuration will still exist. |
 | Duplicate a job |
 | Access the results of the discovery task |
Analyze the results of a discovery job
On the Configuration > Hosts > Discovery page, Hover the target job and click the arrow image next to the status of a Finished job to view the results.
 Figure: Discovery Job Results List
The results show the discovered hosts. Icons allow you to identify the action that will be performed on the host:
| Icon | Description |
|---|---|
 | The host does not exist yet and will be created. |
 | The host already exists |
 | Resticted host types which cannot be created |
Select the hosts you want to add to the list of monitored hosts and click the
Add Hostbutton.If you want, you can edit the mappings and host names linked to this discovered hosts. Click the result to display its settings. In the Mappers section, edit the mapper host name and save
 Figure: Editing Discovery Result Mappings
Go to the Configuration > Hosts page: the newly created hosts appear in the list.
 Figure: Newly Added Hosts in Configuration
If the hosts you selected are not visible in the configuration, go back to the list of jobs and see if an error occurred during the saving task.
Edit a discovery job
Some discovery jobs can be edited:
Note
If a job is set to Manual analysis and its hosts are already monitored, then editing and running the job again will have no effect.
On the Configuration > Hosts > Auto Discovery page, click the discovery job you want. A panel appears on the right.
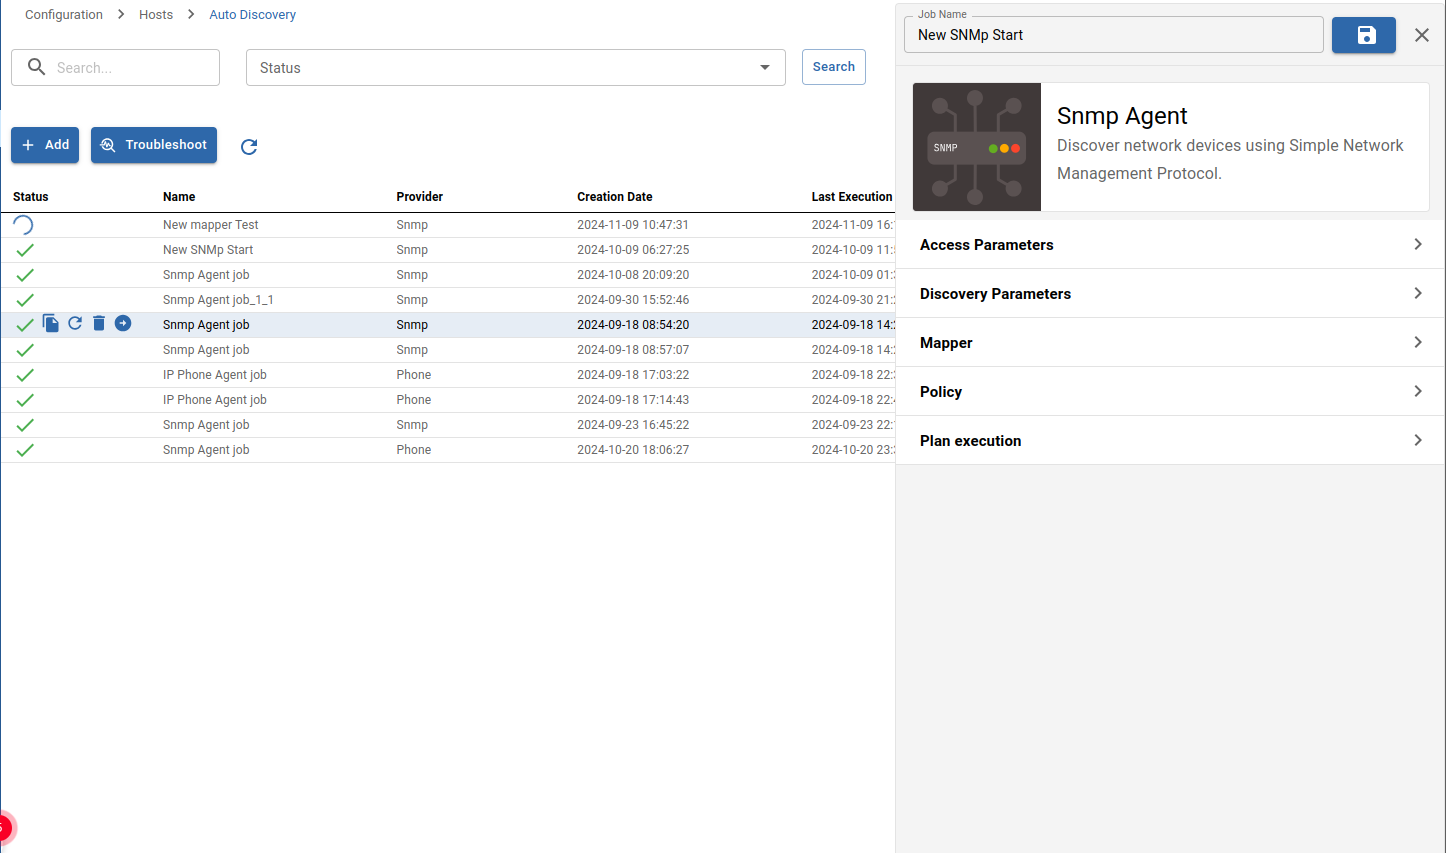 Figure: Editing an Existing Discovery Job
To preserve the consistency of providers and the traceability of actions, the provider for the host cannot be updated. The procedure is the same as described in the Job Discovery Wizard.
131: Click the Save icon at the top right of the panel
How to use mappers
Mappers allow you to:
- Define how the future hosts will be configured, by mapping a value discovered on the host (an attribute) to a field in Sipmon. The list of attributes depends on the discovery provider.
- Include/exclude hosts from the list of results.
There are 3 types of mapper:
| Mapper | Action |
|---|---|
| Template | Add host templates (the template from the Monitoring Connector is added automatically) |
| Host group | Link hosts to a host group |
| Host category | Link a host to a category |
For all those mappers, conditions can be applied to choose whether or not the mapping will actually occur. Operators can be:
is equal tois different fromcontainsdoes not containstarts withends with.
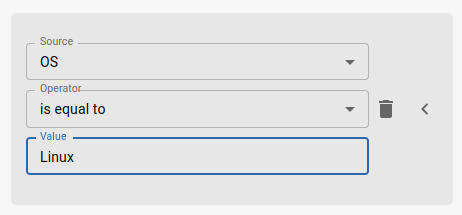 Figure: Setting Mapper Conditions
If you include several conditions inside a mapper, all the conditions must be fulfilled in order for the mapper to apply.
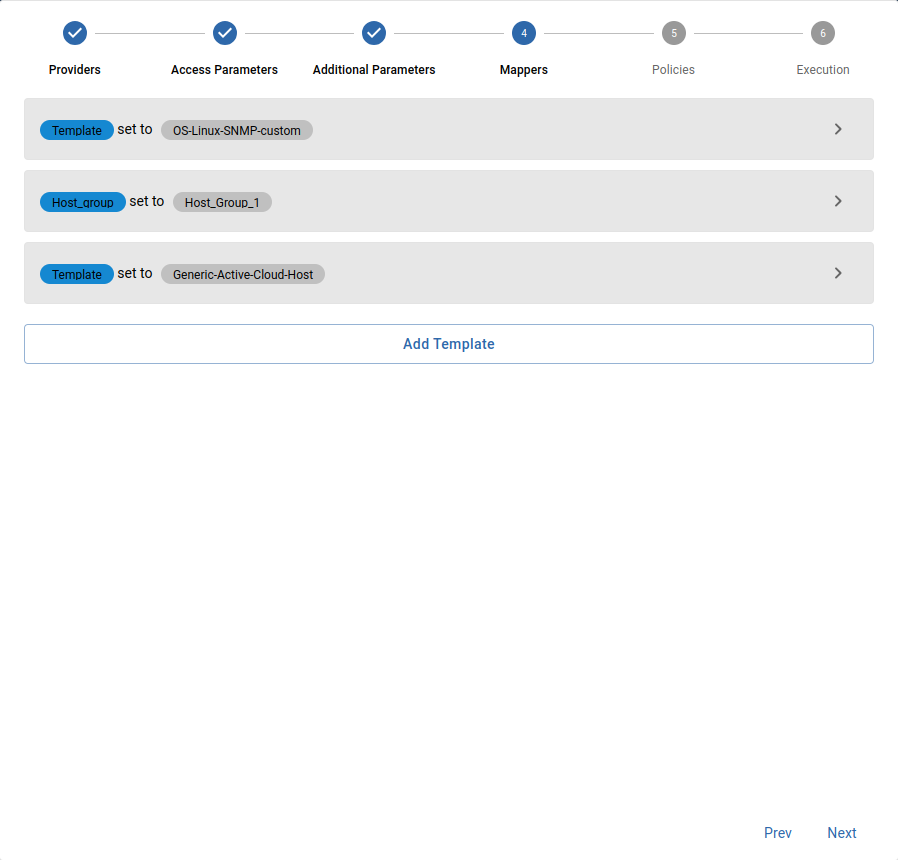 Figure: Mapper Configuration Wizard
When you define several mappers of the same type and the conditions apply for several of them, the last mapper will prevail over the others (the one at the bottom of the list). This applies to the following mappers:
Add a mapper
In the job wizard at step four, or on the editing panel in the Mappers section, click
+Add Template.Select the type of mapper from the dropdown list, and fill every required field.
Click
Saveto add the mapper.
Edit a mapper
In the job wizard at step four, or on the editing panel in the Mappers section, click the arrow actions icon, and then Edit.
Edit the fields you want, or even the type of mapper.
Click
Saveto save the mapper.
Delete a mapper
- In the job wizard at step four, or on the editing panel in the Mappers section, click the arrow actions icon, and then click
Cancel.
Types of mappers
Template
The Template mapper is used to add a template to the host. You can add as many Template mappers as you want (one template per mapper).
As in the example below, you can define a template according to conditions (here, the OS-Linux-SNMP-custom template is applied to Linux hosts).
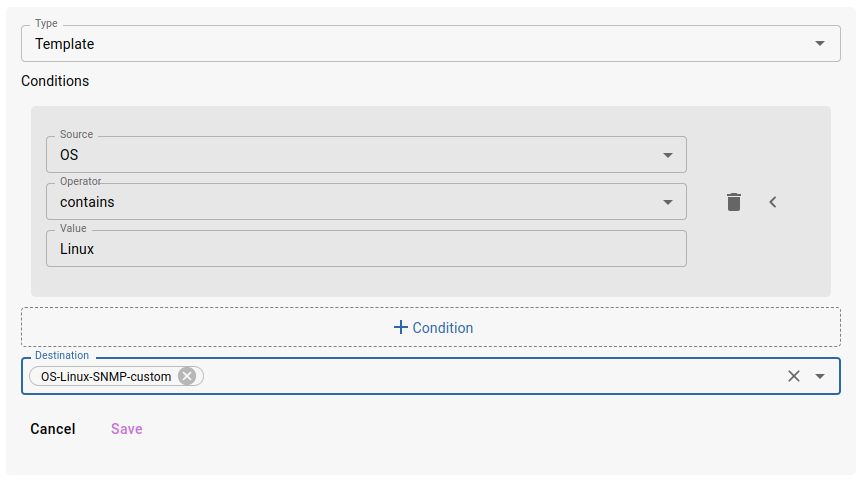 Figure: Template Mapper Example
The Host template list allows you to choose from among all host templates defined in the configuration.
Host group
The discovered hosts can be linked to host groups.Select an existing host group from the dropdown list.
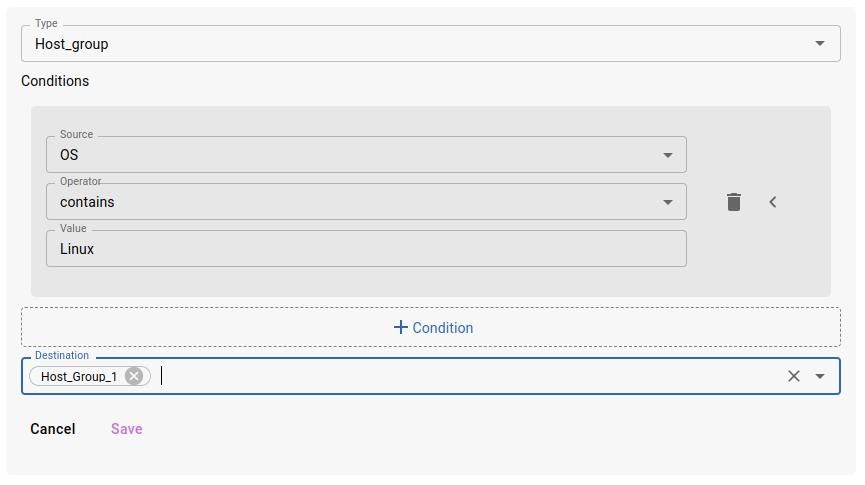 Figure: Host Group Mapper Example
In this example, when discovering Linux servers, the host_group_1 host group will simply be linked to it.
Contact group
The discovered hosts can be linked to contact groups. Select an existing contact group from the dropdown list.
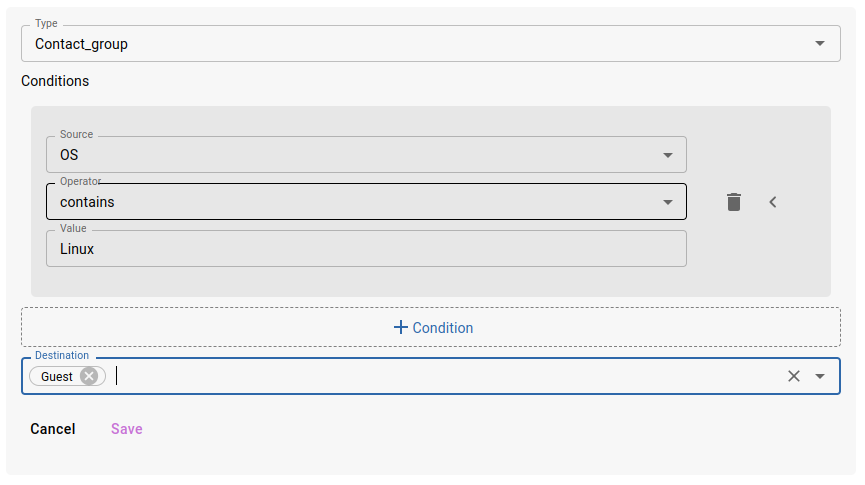 Figure: Contact Group Mapper Example
In this example, when discovering Linux servers, the guest contact group will simply be linked to it.