Sipmon MAP installation for a Sipmon remote server
Sipmon MAP installation on a Sipmon remote server has to be done exactly like the installation on a central server, only configuration and uninstallation are different.
If your Sipmon remote server has not been installed yet, please refer to the following documentation.
Then refer to the installation procedure to install the two main components:
- The web interface.
- The server.
After that, you will have to perform the additional steps explained below, to finish installing Sipmon Map on your remote server.
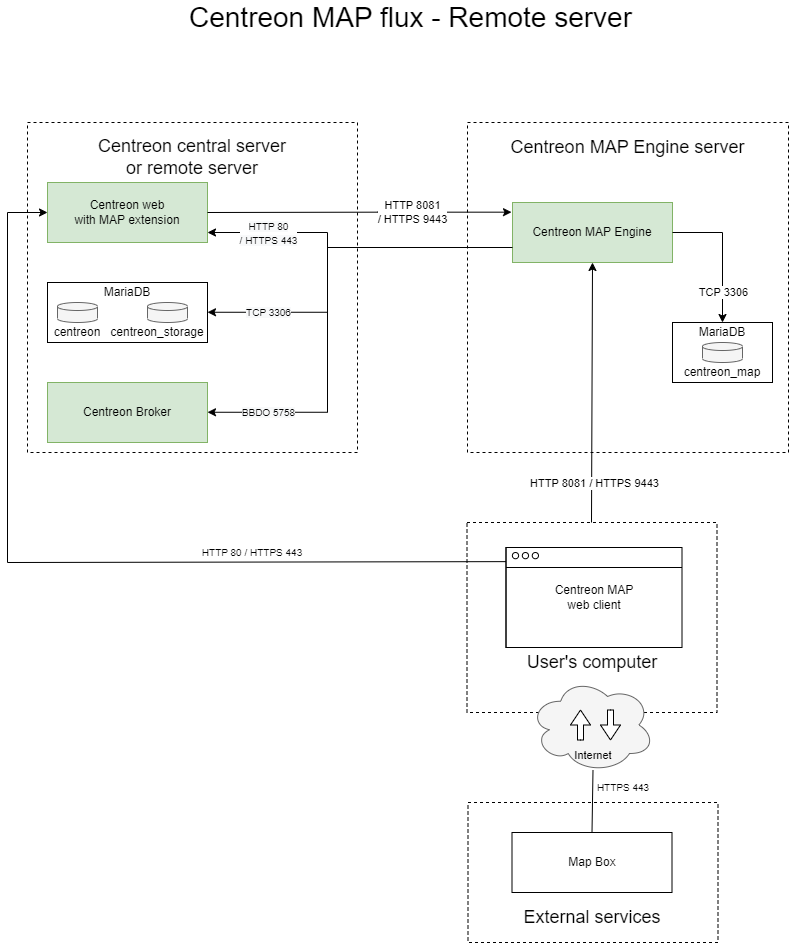
Architecture
The diagram below summarizes the MAP architecture:
Images synchronisation
Add access to the images synchronization page Administration > Parameters > Images
[root@remote ~]# mysql Sipmon
MariaDB [Sipmon]> update topology SET topology_show='1' where topology_name='Images' ;
Sipmon Broker configuration
In order to display real time statuses, Sipmon MAP needs to receive this data from the Sipmon remote server's Broker.
To do so, you need to log in to your central server and modify the Sipmon Broker Master configuration of the Sipmon remote poller. Go to the Configuration > Pollers > Broker configuration menu and edit the remote server's configuration.
In the Output tab, create a new output with the following parameters:
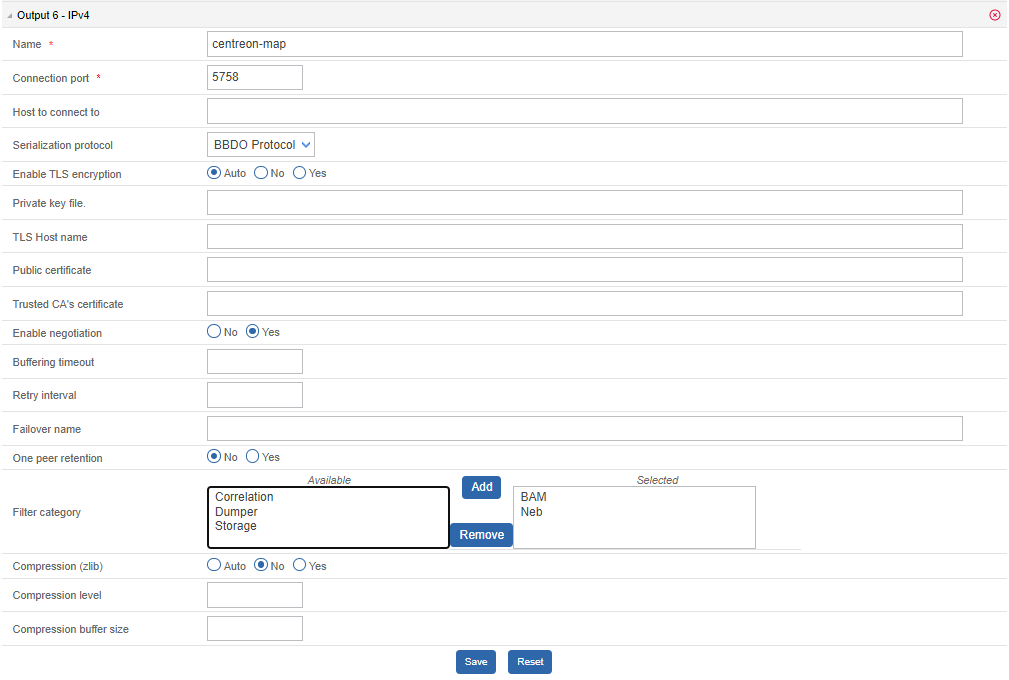
To complete the installation process, generate and deploy the Sipmon remote server configuration by selecting Restart.
Uninstalling Sipmon MAP
On a remote poller, you can uninstall Sipmon MAP module the same way as on the Sipmon central server. All Sipmon Broker configuration for the Sipmon remote server linked to the Sipmon MAP module have to be manually removed. Look at the Sipmon Broker configuration section above to know what output you need to delete for your Sipmon remote server(s).