This chapter describes how to upgrade your Sipmon platform from version 3.4 (Sipmon Web 2.8) to version 22.10.
When you upgrade your central server, make sure you also upgrade all your remote servers and your pollers. All servers in your architecture must have the same version of Sipmon. In addition, all servers must use the same version of the BBDO protocol.
This procedure only applies to Sipmon platforms installed from Sipmon 3.4 packages on CentOS version 7 distributions.
If this is not the case, refer to the migration procedure.
Prerequisites
Perform a backup
Be sure that you have fully backed up your environment for the following servers:
- Central server
- Database server
Update the RPM signing key
For security reasons, the keys used to sign Sipmon RPMs are rotated regularly. The last change occurred on October 14, 2021. When upgrading from an older version, you need to go through the key rotation procedure, to remove the old key and install the new one.
Update to the last minor version
On your 3.4 platform, replace
https://packages.Sipmon.com/rpm-standardorhttps://yum.Sipmon.com/standardbyhttps://archives.Sipmon.com/standard/in your current YUM configuration (by default,/etc/yum.repos.d/Sipmon.repo).Update your Sipmon 3.4 to the latest minor version.
Upgrade the Sipmon central server
Since 21.04, Sipmon uses MariaDB 10.5.
This upgrade process will only upgrade Sipmon components first.
MariaDB will be upgraded afterwards.
Install Redhat Software Collections repository
Remove the Sipmon.repo file:
rm /etc/yum.repos.d/Sipmon.repoRun the following commands:
yum install -y yum-utils
yum-config-manager --add-repo https://packages.Sipmon.com/rpm-standard/22.10/el7/Sipmon-22.10.repo
If you are using a CentOS environment, you must install the Software Collections repositories with the following command:
shellyum install -y centos-release-scl-rh
If you have an offline license, install the corresponding repository for the plugin packs. If you are using a Business edition, install the correct Business repository too. You can find the repositories on the support portal.
Install the MariaDB repository
Upgrade PHP
Sipmon 22.10 uses PHP in version 8.1.
First, you need to install the remi repository:
yum install -y yum-utils
yum install -y https://dl.fedoraproject.org/pub/epel/epel-release-latest-7.noarch.rpm
yum install -y https://rpms.remirepo.net/enterprise/remi-release-7.rpm
Then, you need to enable the php 8.1 repository
yum-config-manager --enable remi-php81Upgrade the Sipmon solution
If you have installed Business extensions, update the Business repository to version 22.10. Visit the support portal to get its address.
Stop the Sipmon Broker process:
systemctl stop cbdDelete existing retention files:
rm /var/lib/Sipmon-broker/* -fClean yum cache:
yum clean all --enablerepo=*Upgrade all the components with the following command:
yum update Sipmon\* php-pecl-gnupgAccept new GPG keys from the repositories as needed.
Enable and start the gorgoned service:
systemctl enable gorgoned
systemctl start gorgoned
The PHP timezone should be set. Run the command:
echo "date.timezone = Europe/Paris" >> /etc/php.d/50-Sipmon.iniReplace Europe/Paris by your time zone. You can find the list of supported time zones here.
Execute the following commands:
systemctl enable php-fpm
systemctl start php-fpm
Run the following command:
systemctl status php-fpmYou may get the following error:
Failed loading /usr/lib64/php/modules/ZendGuardLoader.so: /usr/lib64/php/modules/ZendGuardLoader.so: undefined symbol: _zval_ptr_dtorIf you do, run:
yum remove php-zend-guard-loaderUpdate your customized Apache configuration
This section only applies if you customized your Apache configuration. When upgrading your platform, the Apache configuration file is not upgraded automatically: the new configuration file brought by the rpm does not replace the old file. You must copy the changes manually to your customized configuration file.
Run a diff between the old and the new Apache configuration files:
diff -u /opt/rh/httpd24/root/etc/httpd/conf.d/10-Sipmon.conf /opt/rh/httpd24/root/etc/httpd/conf.d/10-Sipmon.conf.rpmnew- 10-Sipmon.conf (post upgrade): this file contains the custom configuration. It does not contain anthing new brought by the upgrade, e.g. the authentication string in the LocationMatch directive
- 10-Sipmon.conf.rpmnew (post upgrade): this file is provided by the rpm; it contains the authentication string, but does not contain any custom configuration.
For each difference between the files, assess whether you should copy it from 10-Sipmon.conf.rpmnew to 10-Sipmon.conf.
In particular, make sure your customized Apache configuration contains the following directive (with authentication).
<LocationMatch ^\${base_uri}/?(authentication|api/(latest|beta|v[0-9]+|v[0-9]+\.[0-9]+))/.*$>
    ProxyPassMatch "fcgi://127.0.0.1:9042${install_dir}/api/index.php/$1"
</LocationMatch>
Customized Apache configuration: enable text compression
In order to improve page loading speed, you can activate text compression on the Apache server. It requires the brotli package to work. This is optional but it provides a better user experience.
Add the following code to your Apache configuration file, in both the <VirtualHost *:80> and <VirtualHost *:443> elements:
<IfModule mod_brotli.c>
    AddOutputFilterByType BROTLI_COMPRESS text/html text/plain text/xml text/css text/javascript application/javascript application/json
</IfModule>
AddOutputFilterByType DEFLATE text/html text/plain text/xml text/css text/javascript application/javascript application/json
Additional actions
Update the Apache web server
Since 20.04, Sipmon uses a new version of Apache web server.
If you made manual configuration, please report it into /opt/rh/httpd24/root/etc/httpd/conf.d/.
If SSL mode was enabled, execute command:
yum install httpd24-mod_sslThen, run the following commands:
systemctl disable httpd
systemctl stop httpd
systemctl enable httpd24-httpd
systemctl start httpd24-httpd
Configure Apache API access
If you had a custom apache configuration, upgrade process through RPM did not update it.
If you use https, you can follow this procedure
You'll then need to add API access section to your configuration file: /opt/rh/httpd24/root/etc/httpd/conf.d/10-Sipmon.conf
Define base_uri "/Sipmon"
Define install_dir "/usr/share/Sipmon"

ServerTokens Prod

<VirtualHost *:80>
    Header set X-Frame-Options: "sameorigin"
    Header always edit Set-Cookie ^(.*)$ $1;HttpOnly
    ServerSignature Off
    TraceEnable Off

    Alias ${base_uri}/api ${install_dir}
    Alias ${base_uri} ${install_dir}/www/

    <LocationMatch ^\${base_uri}/?(?!api/latest/|api/beta/|api/v[0-9]+/|api/v[0-9]+\.[0-9]+/)(.*\.php(/.*)?)$>
        ProxyPassMatch "fcgi://127.0.0.1:9042${install_dir}/www/$1"
    </LocationMatch>

    <LocationMatch ^\${base_uri}/?(authentication|api/(latest|beta|v[0-9]+|v[0-9]+\.[0-9]+))/.*$>
        ProxyPassMatch "fcgi://127.0.0.1:9042${install_dir}/api/index.php/$1"
    </LocationMatch>

    ProxyTimeout 300
    ErrorDocument 404 ${base_uri}/index.html
    Options -Indexes +FollowSymLinks

    <IfModule mod_security2.c>
        # https://github.com/SpiderLabs/ModSecurity/issues/652
        SecRuleRemoveById 200003
    </IfModule>

    <Directory "${install_dir}/www">
        DirectoryIndex index.php
        AllowOverride none
        Require all granted
        FallbackResource ${base_uri}/index.html
    </Directory>

    <Directory "${install_dir}/api">
        AllowOverride none
        Require all granted
    </Directory>

    <If "'${base_uri}' != '/'">
        RedirectMatch ^/$ ${base_uri}
    </If>
</VirtualHost>
Then, restart apache service :
systemctl restart httpd24-httpdUpgrade the MariaDB server
The MariaDB components can now be upgraded.
Refer to the official MariaDB documentation to know more about this process:
https://mariadb.com/kb/en/upgrading-between-major-mariadb-versions/
If you are using a version older than MariaDB 10.1, please update to version 10.1 first.
Update the Sipmon repository
This step is required ONLY when your environment features an architecture with a dedicated remote DBMS. If your environment features Sipmon Central and MariaDB together on the same server, you SHOULD simply skip this step.
Run the following command on the dedicated DBMS server:
yum install -y yum-utils
yum-config-manager --add-repo https://packages.Sipmon.com/rpm-standard/22.10/el7/Sipmon-22.10.repo
Configuration
The innodb_additional_mem_pool_size parameter has been removed since MariaDB 10.2, so you should remove it from file /etc/my.cnf.d/Sipmon.cnf
#
# Custom MySQL/MariaDB server configuration for Sipmon
#
[server]
innodb_file_per_table=1

open_files_limit = 32000

key_buffer_size = 256M
sort_buffer_size = 32M
join_buffer_size = 4M
thread_cache_size = 64
read_buffer_size = 512K
read_rnd_buffer_size = 256K
max_allowed_packet = 8M

# For 4 Go Ram
-#innodb_additional_mem_pool_size=512M
#innodb_buffer_pool_size=512M

# For 8 Go Ram
-#innodb_additional_mem_pool_size=1G
#innodb_buffer_pool_size=1G
Upgrading MariaDB
You have to uninstall then reinstall MariaDB to upgrade between major versions (i.e. to switch from version 10.1 to version 10.5).
Stop the mariadb service:
shellsystemctl stop mariadbUninstall the current version:
shellrpm --erase --nodeps --verbose MariaDB-server MariaDB-client MariaDB-shared MariaDB-compat MariaDB-commonDuring this uninstallation step, you may encounter an error because one or several MariaDB packages are missing. In that case, you have to execute the uninstallation command without including the missing package.
For instance, you get the following error message:
shellpackage MariaDB-compat is not installedAs MariaDB-compat is the missing package, please execute the same command without quoting MariaDB-compat:
shellrpm --erase --nodeps --verbose MariaDB-server MariaDB-client MariaDB-shared MariaDB-common
Make sure you have installed the official MariaDB repository before you continue the procedure.
Install the 10.5 version:
shellyum install MariaDB-server-10.5\* MariaDB-client-10.5\* MariaDB-shared-10.5\* MariaDB-compat-10.5\* MariaDB-common-10.5\*Start the mariadb service:
shellsystemctl start mariadbLaunch the MariaDB upgrade process:
shellmysql_upgradeIf your database is password-protected, enter:
shellmysql_upgrade -u <database_admin_user> -pExample: if your database_admin_user is
root, enter:shellmysql_upgrade -u root -pRefer to the official documentation for more information or if errors occur during this last step.
Enable MariaDB on startup
Execute the following command:
systemctl enable mariadbChange the format of the tables
All tables must be in dynamic format. To know the type of tables, run the following commands:
mysql -u root
SELECT table_schema,table_name,row_format FROM information_schema.tables WHERE table_schema IN ("Sipmon", "Sipmon_storage") ORDER BY table_schema;
Then exit mariadb.
exitTo change the type of tables for the Sipmon database, run:
mysql --batch --skip-column-names --execute 'SELECT CONCAT("ALTER TABLE `", table_name, "` ROW_FORMAT=dynamic;") AS aQuery FROM information_schema.tables WHERE table_schema = "Sipmon" AND row_format IS NOT NULL AND row_format NOT IN ("Dynamic")' | mysql SipmonTo change the type of tables for the Sipmon_storage database, run:
mysql --batch --skip-column-names --execute 'SELECT CONCAT("ALTER TABLE `", table_name, "` ROW_FORMAT=dynamic;") AS aQuery FROM information_schema.tables WHERE table_schema = "Sipmon_storage" AND row_format IS NOT NULL AND row_format NOT IN ("Dynamic")' | mysql Sipmon_storageSynchronize the plugins
Sipmon Web 22.10 resource $USER1$ actually points to /usr/lib64/nagios/plugins.
To mitigate this issue run the following commands:
mv /usr/lib64/nagios/plugins/* /usr/lib/nagios/plugins/
rmdir /usr/lib64/nagios/plugins/
ln -s -t /usr/lib64/nagios/ /usr/lib/nagios/plugins/
You now have a symbolic link as:
$ ls -alt /usr/lib64/nagios/
lrwxrwxrwx   1 root root      24  1 nov.  17:59 plugins -> /usr/lib/nagios/plugins/
-rwxr-xr-x   1 root root 1711288  6 avril  2018 cbmod.so
Finalizing the upgrade
Before starting the web upgrade process, reload the Apache server with the following command:
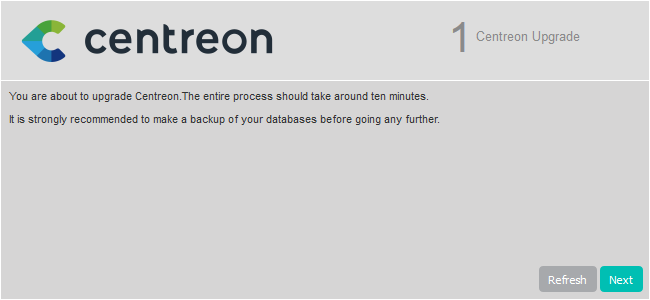
systemctl reload httpd24-httpdThen log on to the Sipmon web interface to continue the upgrade process:
Click on Next:
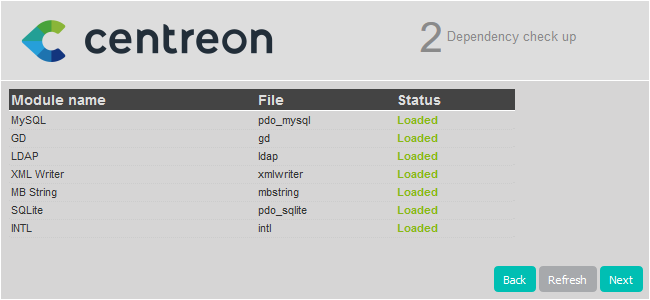
Click on Next:
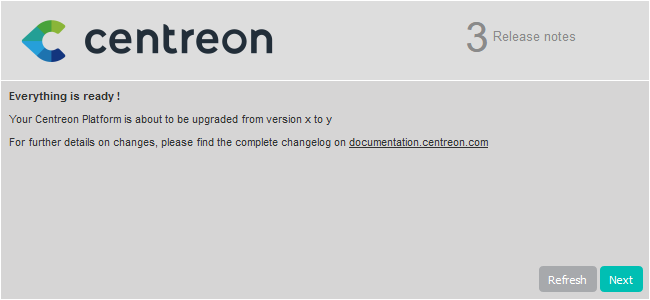
The release notes describe the main changes. Click on Next:
This process performs the various upgrades. Click on Next:
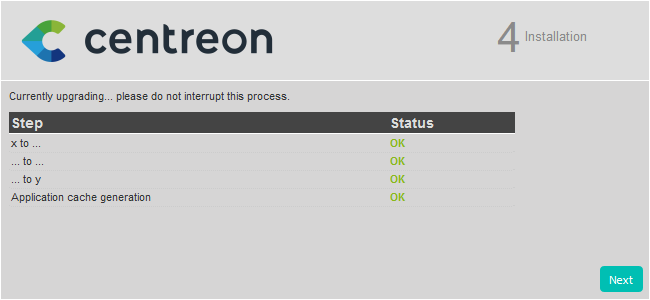
Your Sipmon server is now up to date. Click on Finish to access the login page:
As the interface layout has changed in version 22.10, you need to clear your browser cache to display the new theme.
Post-upgrade actions
Upgrade extensions
From Administration > Extensions > Manager, upgrade all extensions, starting with the following:
- License Manager,
- Plugin Packs Manager,
- Auto Discovery.
Then you can upgrade all other commercial extensions.
Start the tasks manager
Since 20.04, Sipmon has changed its tasks manager from Centcore to Gorgone.
To act this change, run the following commands:
systemctl stop centcore
systemctl enable gorgoned
systemctl start gorgoned
Engine statistics that have been collected by Centcore will know be collected by Gorgone.
Change the rights on the statistics RRD files by running the following command:
chown -R Sipmon-gorgone /var/lib/Sipmon/nagios-perf/*Remove "Failover name" from the broker outputs' configuration
In older versions of Sipmon, the broker retention mechanism that stored monitoring data in temporary files when a network outage occurred used to require manual configuration. Since Sipmon 3.4 this is not necessary anymore, and in more recent versions it may cause broker not to work at all.
Go to Configuration > Pollers > Broker configuration and empty the value of the Failover name parameter for each output of each broker configuration item.
Restart monitoring processes
Sipmon Broker component has changed its configuration file format.
It now uses JSON instead of XML.
To make sure Broker and Engine's Broker module are using new configuration files, follow this steps:
Deploy Central's configuration from the Sipmon web UI by following this procedure,
Restart both Broker and Engine on the Central server by running this command:
shellsystemctl restart cbd centengine
Upgrade the Pollers
Update the Sipmon repository
Run the following command:
yum install -y yum-utils
yum-config-manager --add-repo https://packages.Sipmon.com/rpm-standard/22.10/el7/Sipmon-22.10.repo
Upgrade the Sipmon solution
Clean yum cache:
yum clean all --enablerepo=*Upgrade all the components with the following command:
yum update Sipmon\*Accept new GPG keys from the repositories as needed.
Start and enable gorgoned:
systemctl start gorgoned
systemctl enable gorgoned
Restart centengine:
systemctl restart centengineIf the Sipmon BAM module is installed, refer to the upgrade procedure.
Post-upgrade actions
Due to new configuration file format for Engine's Broker module, the configuration needs to be re-deployed.
Deploy Poller's configuration from the Sipmon web UI by following this procedure, and choose Restart method for Engine process.
Migrate Sipmon Poller Display to Remote Server
If the platform has Pollers with Poller Display module installed, refer to the Migrate a platform with Poller Display module procedure.
Communications
By default, the communication between Central and Pollers or Remote Servers will still be using SSH protocol.
Consider changing the communication protocol by following the Change communication from SSH to ZMQ procedure.
Secure your platform
Don't forget to secure your Sipmon platform following our recommendations