Auto Discovery
This document provides guidance on setting up the development environment for this module.
Download
In-host download you can ssh to the target host and download or clone the repository from there. For example:
ssh username@hostip
cd /path/to/any/folder
git clone https://github.com/Synergysis/Auto-Discovery-V2 .
Note: To accomplish this, you must have Git installed on the target host. Git v1.8.3.1 is recommended.
** Local Download ** Alternatively, you can download the repository locally and then upload it to the target host. This approach eliminates the need to install Git on the host.
For Example:
git clone https://github.com/Synergysis/Auto-Discovery-V2
scp  /path/to/module username@hostip:/path/to/destination
Environment Setup
Developing everything in one place can be challenging due to the module's multiple components that are distributed across various locations in Sipmon system.
Agent Scripts
Can be found in folder ./Auto-Discovery-V2/agents This is the module's core, housing all the essential scripts necessary for its operation. Most of the time you don't need to change it. if you do , you need to setup the environment as follows
Dependencies:
- python >= 3.6.x
- mysql = 15.1 Distrib 10.5.22-MariaDB
- pip = 21.3.1
Entering into the python virtual environment
    cd path/to/agent/folder
    source ./bin/activate
install module dependencies
pip install loguru==0.7.0 python-nmap==0.7.1 SQLAlchemy==1.4.48Web UI
This component manages the web UI aspect of the module, built using React MUI. It dynamically integrates with the Sipmon UI during runtime. Can be found on ./Auto-Discovery-V2/www.
Dependencies
- node = 16.18.1
- npm = 8.19.2
install module dependencies
 npm install --legacy-peer-deps
 npm run build
move folder to the Sipmon
cd /path/to/Auto-Discovery-V2/www/modules/
cp -R ./autodisco path/to/sipmon/modules/
Development
Prior to development, it is crucial to gain a comprehensive understanding of the current processes and the module's structure.
Folder structures:
 .
├── agents
│   ├── bin
│   ├── build
│   │   ├── DiscoveryCentral
│   │   └── DiscoveryPoller
│   ├── dist
│   ├── includes
│   ├── lib
│   │   └── python3.6
│   └── log
└── www
    └── modules
        └── sipmon_discovery
            ├── images
            ├── php
            ├── react
            │   ├── components  ----------------> react components
            │   ├── extensions  ----------------> Provider
            │   │   ├── Phone
            │   │   │   ├── api
            │   │   │   ├── components
            │   │   │   ├── helpers
            │   │   │   └── model
            │   │   ├── Snmp
            │   │   │   ├── api
            │   │   │   ├── components
            │   │   │   └── helpers
            │   │   └── SnmpV3
            │   │       ├── api
            │   │       ├── components
            │   │       └── helpers
            │   ├── pages
            │   │   ├── home
            │   │   └── result
            │   ├── services --------------------> services used by components
            │   │   ├── api
            │   │   │   ├── jobs
            │   │   │   ├── monitors
            │   │   │   └── providers
            │   │   └── model
            │   ├── test
            │   └── utils -----------------------> global functions/ States
            │       ├── context
            │       └── states
            ├── sql -----------------------------> sql
            ├── static
            └── webServices ---------------------> Backend (php)
                ├── providers -------------------> Provider  backend (php)
                │   ├── assets
                │   │   └── images
                ├── rest ------------------------> REST API
                └── src -------------------------> Backend resources
                    ├── Model
                    └── Resource
Note: only the important components are listed above
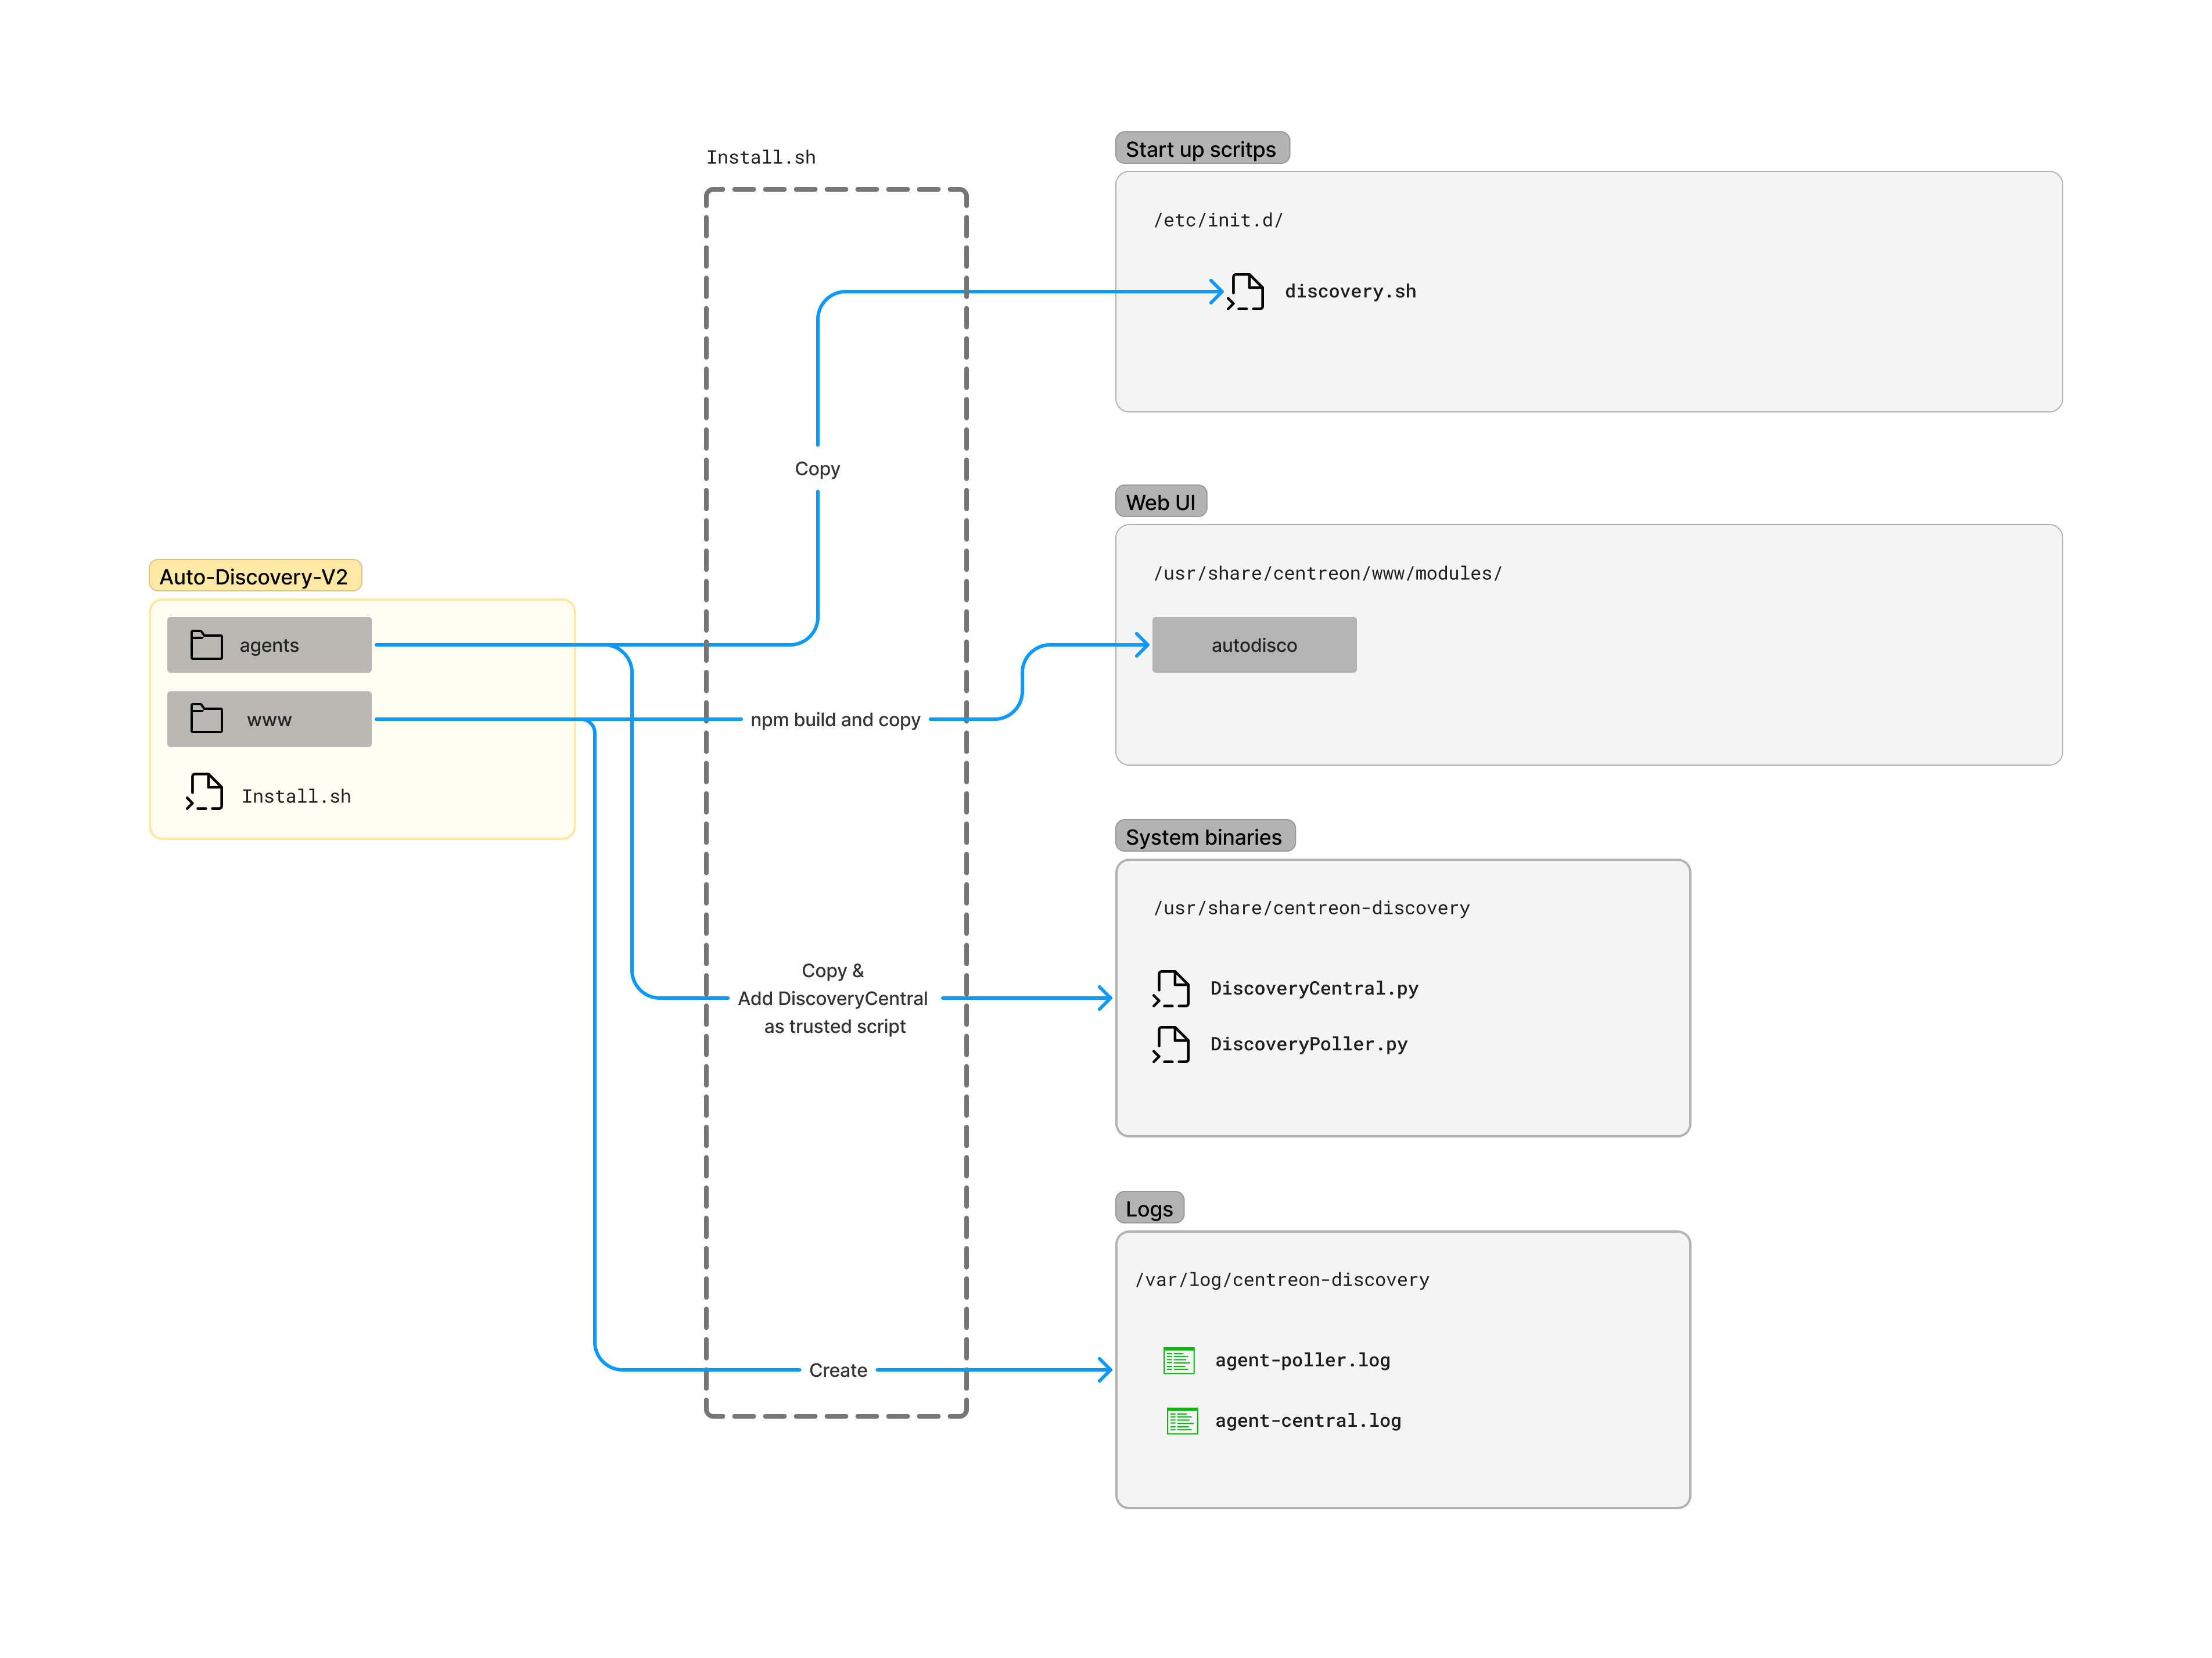
Module Architecture:

Process of the install.sh
Getting Started
UI Development
To begin development, you must establish a remote connection to /path/to/sipmon/module/autodisco/ through your integrated development environment (IDE).
install the module:
In order to use the module you need to install Auto Disco module from the UI also.
- Go to the
Administration>Extensions>Manager - Install the Sipmon Auto Discovery Module
- Then go to
Configuration>Hosts>Auto Disco
watch for file changes
cd /path/to/sipmon/modules/autodisco/react
npm run start:dev
Note: Process will be faster if you run above listener on the host itself
Deployment
Please use the latest experiment branch and merge to your development branch. For now you have to bring all the changes you have done in the path/to/sipmon/modules/autodisco to the path/to/Auto-Disco-v2/www/modules.
Then commit and push to the GitHub
Create a PR to the experiment branch and notify the Lead Developer.